PrimeHub
  • Introduction
  • Installation
  • Tiers and Licenses
  • End-to-End Tutorial
    • 1 - MLOps Introduction and Scoping the Project
    • 2 - Train and Manage the Model
    • 3 - Compare, Register and Deploy the Model
    • 4 - Build the Web Application
    • 5 - Summary
  • User Guide
    • User Portal
    • Notebook
      • Notebook Tips
      • Advanced Settings
      • PrimeHub Notebook Extension
      • Submit Notebook as Job
    • Jobs
      • Job Artifacts
      • Tutorial
        • (Part1) MNIST classifier training
        • (Part2) MNIST classifier training
        • (Advanced) Use Job Submission to Tune Hyperparameters
        • (Advanced) Model Serving by Seldon
        • Job Artifacts Simple Usecase
    • Models
      • Manage and Deploy Model
      • Model Management Configuration
    • Deployments
      • Pre-packaged servers
        • TensorFlow server
        • PyTorch server
        • SKLearn server
        • Customize Pre-packaged Server
        • Run Pre-packaged Server Locally
      • Package from Language Wrapper
        • Model Image for Python
        • Model Image for R
        • Reusable Base Image
      • Prediction APIs
      • Model URI
      • Tutorial
        • Model by Pre-packaged Server
        • Model by Pre-packaged Server (PHFS)
        • Model by Image built from Language Wrapper
    • Shared Files
    • Datasets
    • Apps
      • Label Studio
      • MATLAB
      • MLflow
      • Streamlit
      • Tutorial
        • Create Your Own App
        • Create an MLflow server
        • Label Dataset by Label Studio
        • Code Server
    • Group Admin
      • Images
      • Settings
    • Generate an PrimeHub API Token
    • Python SDK
    • SSH Server Feature
      • VSCode SSH Notebook Remotely
      • Generate SSH Key Pair
      • Permission Denied
      • Connection Refused
    • Advanced Tutorial
      • Labeling the data
      • Notebook as a Job
      • Custom build the Seldon server
      • PrimeHub SDK/CLI Tools
  • Administrator Guide
    • Admin Portal
      • Create User
      • Create Group
      • Assign Group Admin
      • Create/Plan Instance Type
      • Add InfuseAI Image
      • Add Image
      • Build Image
      • Gitsync Secret for GitHub
      • Pull Secret for GitLab
    • System Settings
    • User Management
    • Group Management
    • Instance Type Management
      • NodeSelector
      • Toleration
    • Image Management
      • Custom Image Guideline
    • Volume Management
      • Upload Server
    • Secret Management
    • App Settings
    • Notebooks Admin
    • Usage Reports
  • Reference
    • Jupyter Images
      • repo2docker image
      • RStudio image
    • InfuseAI Images List
    • Roadmap
  • Developer Guide
    • GitHub
    • Design
      • PrimeHub File System (PHFS)
      • PrimeHub Store
      • Log Persistence
      • PrimeHub Apps
      • Admission
      • Notebook with kernel process
      • JupyterHub
      • Image Builder
      • Volume Upload
      • Job Scheduler
      • Job Submission
      • Job Monitoring
      • Install Helper
      • User Portal
      • Meta Chart
      • PrimeHub Usage
      • Job Artifact
      • PrimeHub Apps
    • Concept
      • Architecture
      • Data Model
      • CRDs
      • GraphQL
      • Persistence Storages
      • Persistence
      • Resources Quota
      • Privilege
    • Configuration
      • How to configure PrimeHub
      • Multiple Jupyter Notebook Kernels
      • Configure SSH Server
      • Configure Job Submission
      • Configure Custom Image Build
      • Configure Model Deployment
      • Setup Self-Signed Certificate for PrimeHub
      • Chart Configuration
      • Configure PrimeHub Store
    • Environment Variables
Powered by GitBook
On this page
  1. Administrator Guide
  2. Admin Portal

Assign Group Admin

This quick-start guide shows how to assign the role of Group Admin to users.

PreviousCreate GroupNextCreate/Plan Instance Type

Last updated 2 years ago

  1. Log in as an administrator and switch to the Admin Portal.

  2. Click Groups in the left sidebar, and then click the pencil icon in the Actions column for the group you want to edit.

  3. In the Members section, click the checkbox next to a username to assign the role of Group Admin. Multiple users may be assigned the role of Group Admin.
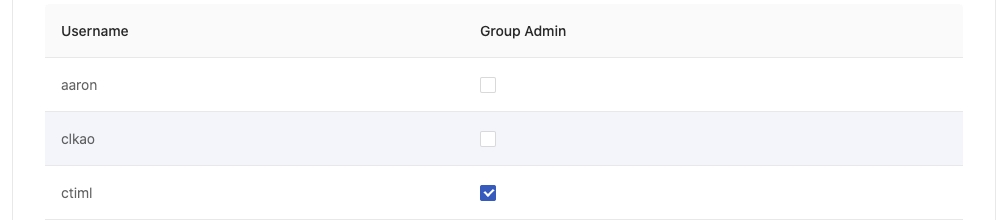
  4. Click Confirm to save your changes.

Next

In the next quick-start, we will learn how to create instance types and images.