PrimeHub
  • Introduction
  • Installation
  • Tiers and Licenses
  • End-to-End Tutorial
    • 1 - MLOps Introduction and Scoping the Project
    • 2 - Train and Manage the Model
    • 3 - Compare, Register and Deploy the Model
    • 4 - Build the Web Application
    • 5 - Summary
  • User Guide
    • User Portal
    • Notebook
      • Notebook Tips
      • Advanced Settings
      • PrimeHub Notebook Extension
      • Submit Notebook as Job
    • Jobs
      • Job Artifacts
      • Tutorial
        • (Part1) MNIST classifier training
        • (Part2) MNIST classifier training
        • (Advanced) Use Job Submission to Tune Hyperparameters
        • (Advanced) Model Serving by Seldon
        • Job Artifacts Simple Usecase
    • Models
      • Manage and Deploy Model
      • Model Management Configuration
    • Deployments
      • Pre-packaged servers
        • TensorFlow server
        • PyTorch server
        • SKLearn server
        • Customize Pre-packaged Server
        • Run Pre-packaged Server Locally
      • Package from Language Wrapper
        • Model Image for Python
        • Model Image for R
        • Reusable Base Image
      • Prediction APIs
      • Model URI
      • Tutorial
        • Model by Pre-packaged Server
        • Model by Pre-packaged Server (PHFS)
        • Model by Image built from Language Wrapper
    • Shared Files
    • Datasets
    • Apps
      • Label Studio
      • MATLAB
      • MLflow
      • Streamlit
      • Tutorial
        • Create Your Own App
        • Create an MLflow server
        • Label Dataset by Label Studio
        • Code Server
    • Group Admin
      • Images
      • Settings
    • Generate an PrimeHub API Token
    • Python SDK
    • SSH Server Feature
      • VSCode SSH Notebook Remotely
      • Generate SSH Key Pair
      • Permission Denied
      • Connection Refused
    • Advanced Tutorial
      • Labeling the data
      • Notebook as a Job
      • Custom build the Seldon server
      • PrimeHub SDK/CLI Tools
  • Administrator Guide
    • Admin Portal
      • Create User
      • Create Group
      • Assign Group Admin
      • Create/Plan Instance Type
      • Add InfuseAI Image
      • Add Image
      • Build Image
      • Gitsync Secret for GitHub
      • Pull Secret for GitLab
    • System Settings
    • User Management
    • Group Management
    • Instance Type Management
      • NodeSelector
      • Toleration
    • Image Management
      • Custom Image Guideline
    • Volume Management
      • Upload Server
    • Secret Management
    • App Settings
    • Notebooks Admin
    • Usage Reports
  • Reference
    • Jupyter Images
      • repo2docker image
      • RStudio image
    • InfuseAI Images List
    • Roadmap
  • Developer Guide
    • GitHub
    • Design
      • PrimeHub File System (PHFS)
      • PrimeHub Store
      • Log Persistence
      • PrimeHub Apps
      • Admission
      • Notebook with kernel process
      • JupyterHub
      • Image Builder
      • Volume Upload
      • Job Scheduler
      • Job Submission
      • Job Monitoring
      • Install Helper
      • User Portal
      • Meta Chart
      • PrimeHub Usage
      • Job Artifact
      • PrimeHub Apps
    • Concept
      • Architecture
      • Data Model
      • CRDs
      • GraphQL
      • Persistence Storages
      • Persistence
      • Resources Quota
      • Privilege
    • Configuration
      • How to configure PrimeHub
      • Multiple Jupyter Notebook Kernels
      • Configure SSH Server
      • Configure Job Submission
      • Configure Custom Image Build
      • Configure Model Deployment
      • Setup Self-Signed Certificate for PrimeHub
      • Chart Configuration
      • Configure PrimeHub Store
    • Environment Variables
Powered by GitBook
On this page
  • Overview
  • Spawning
  • Notebook Logs
  • Stop
  • Notice
  • Reference
  1. User Guide

Notebook

PreviousUser PortalNextNotebook Tips

Last updated 2 years ago

Overview

  • Instance Types: The selection of instance types according to the current group context

  • Images: The selection of images according to the current group context

  • User Limits: The resources constraints are on the current user

  • Group Resources: The resources dashboard indicates current used resource and the limit according to the current group context

  • Volumes: Volumes are associated with the current group

  • Show advanced settings: Display the advanced settings of launching Notebook

Launch

  1. Log in User Portal with a user account, select Notebooks and click Start My Server to enter the spawner page.

  2. Confirm if the current group is what you desire; switch the group by the Group: dropdown at the top of the right side.

  3. Select an Instance Type for the resource allocation to this project. It lists instance types only within the context of the group.

  4. Select an Image which the project is based on. It lists images only within the context of the group.

    Accordingly, images are selectable only if Types of which match the selected Instance Type that guarantees hub is spawned with the proper image.

    **** Group/System Image

    From image selection, i hint indicates an image Group image or System image.

At very first time, browser will block the pop-up from PrimeHub by default, please allow the pop-up from PrimeHub. Click Launch Notebook Server to open Notebook in a new tab once the pop-up is allowed.

Spawning

From Notebook tab, it shows the spawning progress.

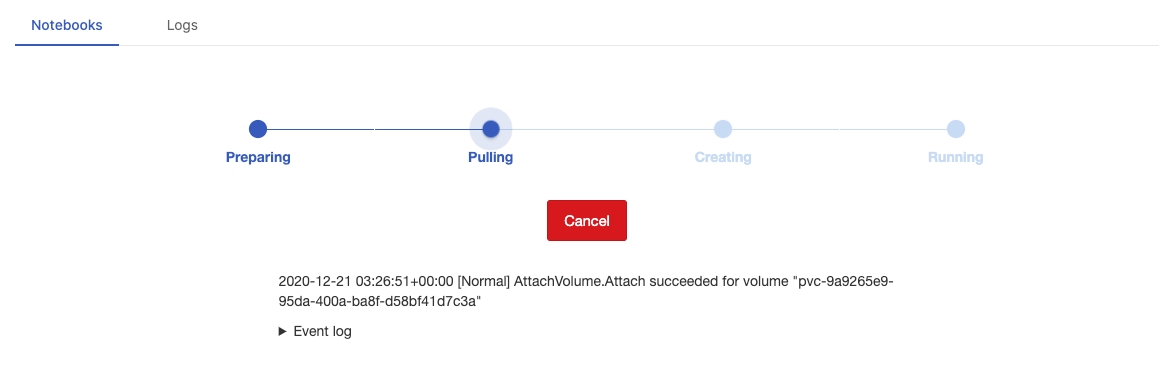
Spawning can be cancelled by clicking Cancel.
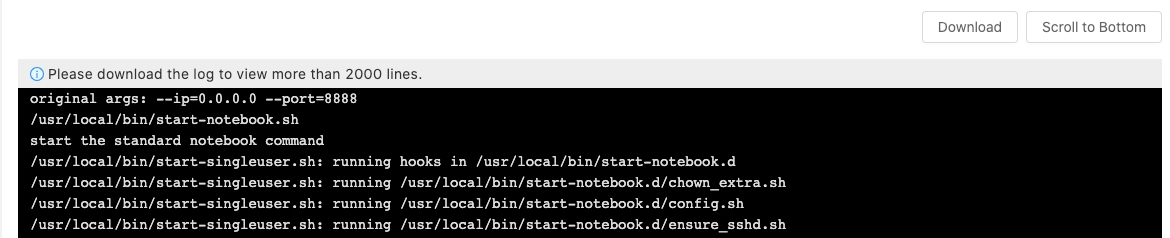
Notebook Logs

Logs are retrieved from Jupyter Pod since Notebook spawning to Notebook end. The logs can be viewed from Logs tab and be downloaded as a file as long as Notebook is alive. Once Notebook is terminated, logs are gone with it. In this case, we can only check latest logs cached by UI.
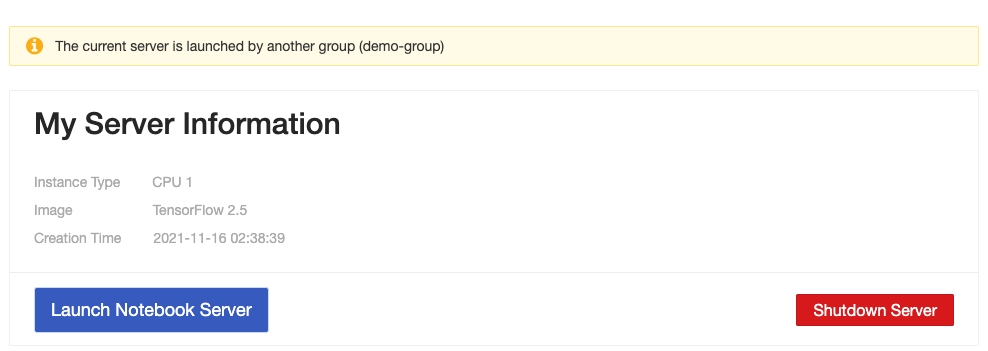
Logs are shown when Notebook pod is being started or alive. If there is no running notebook, it shows Error: cannot get log due to pods "jupyter-xxxx" not found.

Stop

Click Shutdown Server. It takes a short while to stop it.

Notice

If switching the current working group after the Notebook is launched, it indicates the Notebook is retained in the other group.

Reference

Enabled if required. Click Start Notebook. Your Server environment would be instantiated. Once the Notebook is spawned, it will pop up a new tab.

Advanced Settings
Accessible Data Store from Notebook