4 - Build the Web Application
Introduction
This tutorial will add a web interface to our deployed model using Streamlit. This will allow us to upload images, view results, and adjust the threshold for detecting a good or bad screw in a web browser.
What is Streamlit?
For most of the data scientists, we did not know how to write the front-end code. Therefore, we can use the streamlit to build the web service and share the data and the model result. It is convenient for data scientists to use python code to create a new application. For more detail, you can see the Streamlit website and documentation.
Prerequisites
Find the tutorial_screw_app.py file in the project folder.
→ You can see the python code file in the./<group-name>/primehub-screw-detection/streamlit/ folder.
End-to-end Step
Install Streamlit in PrimeHub Apps
User portal → Apps → Click + Application → Click + Install in PrimeHub in Streamlit → Fill in the information
Name
Screw Defect Detection
[Env] FILE_PATH
/project//primehub-screw-detection/streamlit/tutorial_screw_app. py
[Env] ENDPOINT
InstanceTypes
CPU-1
Using the Web Interface
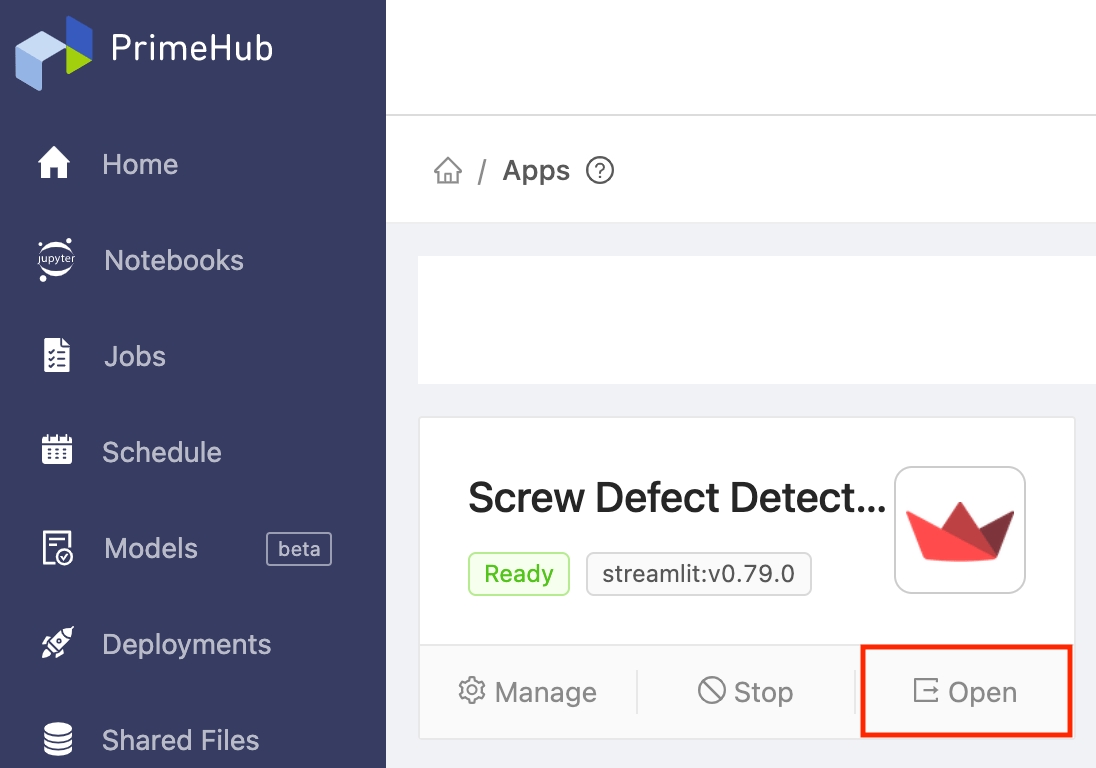
Once Streamlit is ready, click Open to launch the web interface.
Model prediction
Click the Browse Files button at the top left to upload images of screws. The uploaded images and their inference results will be shown on the right.
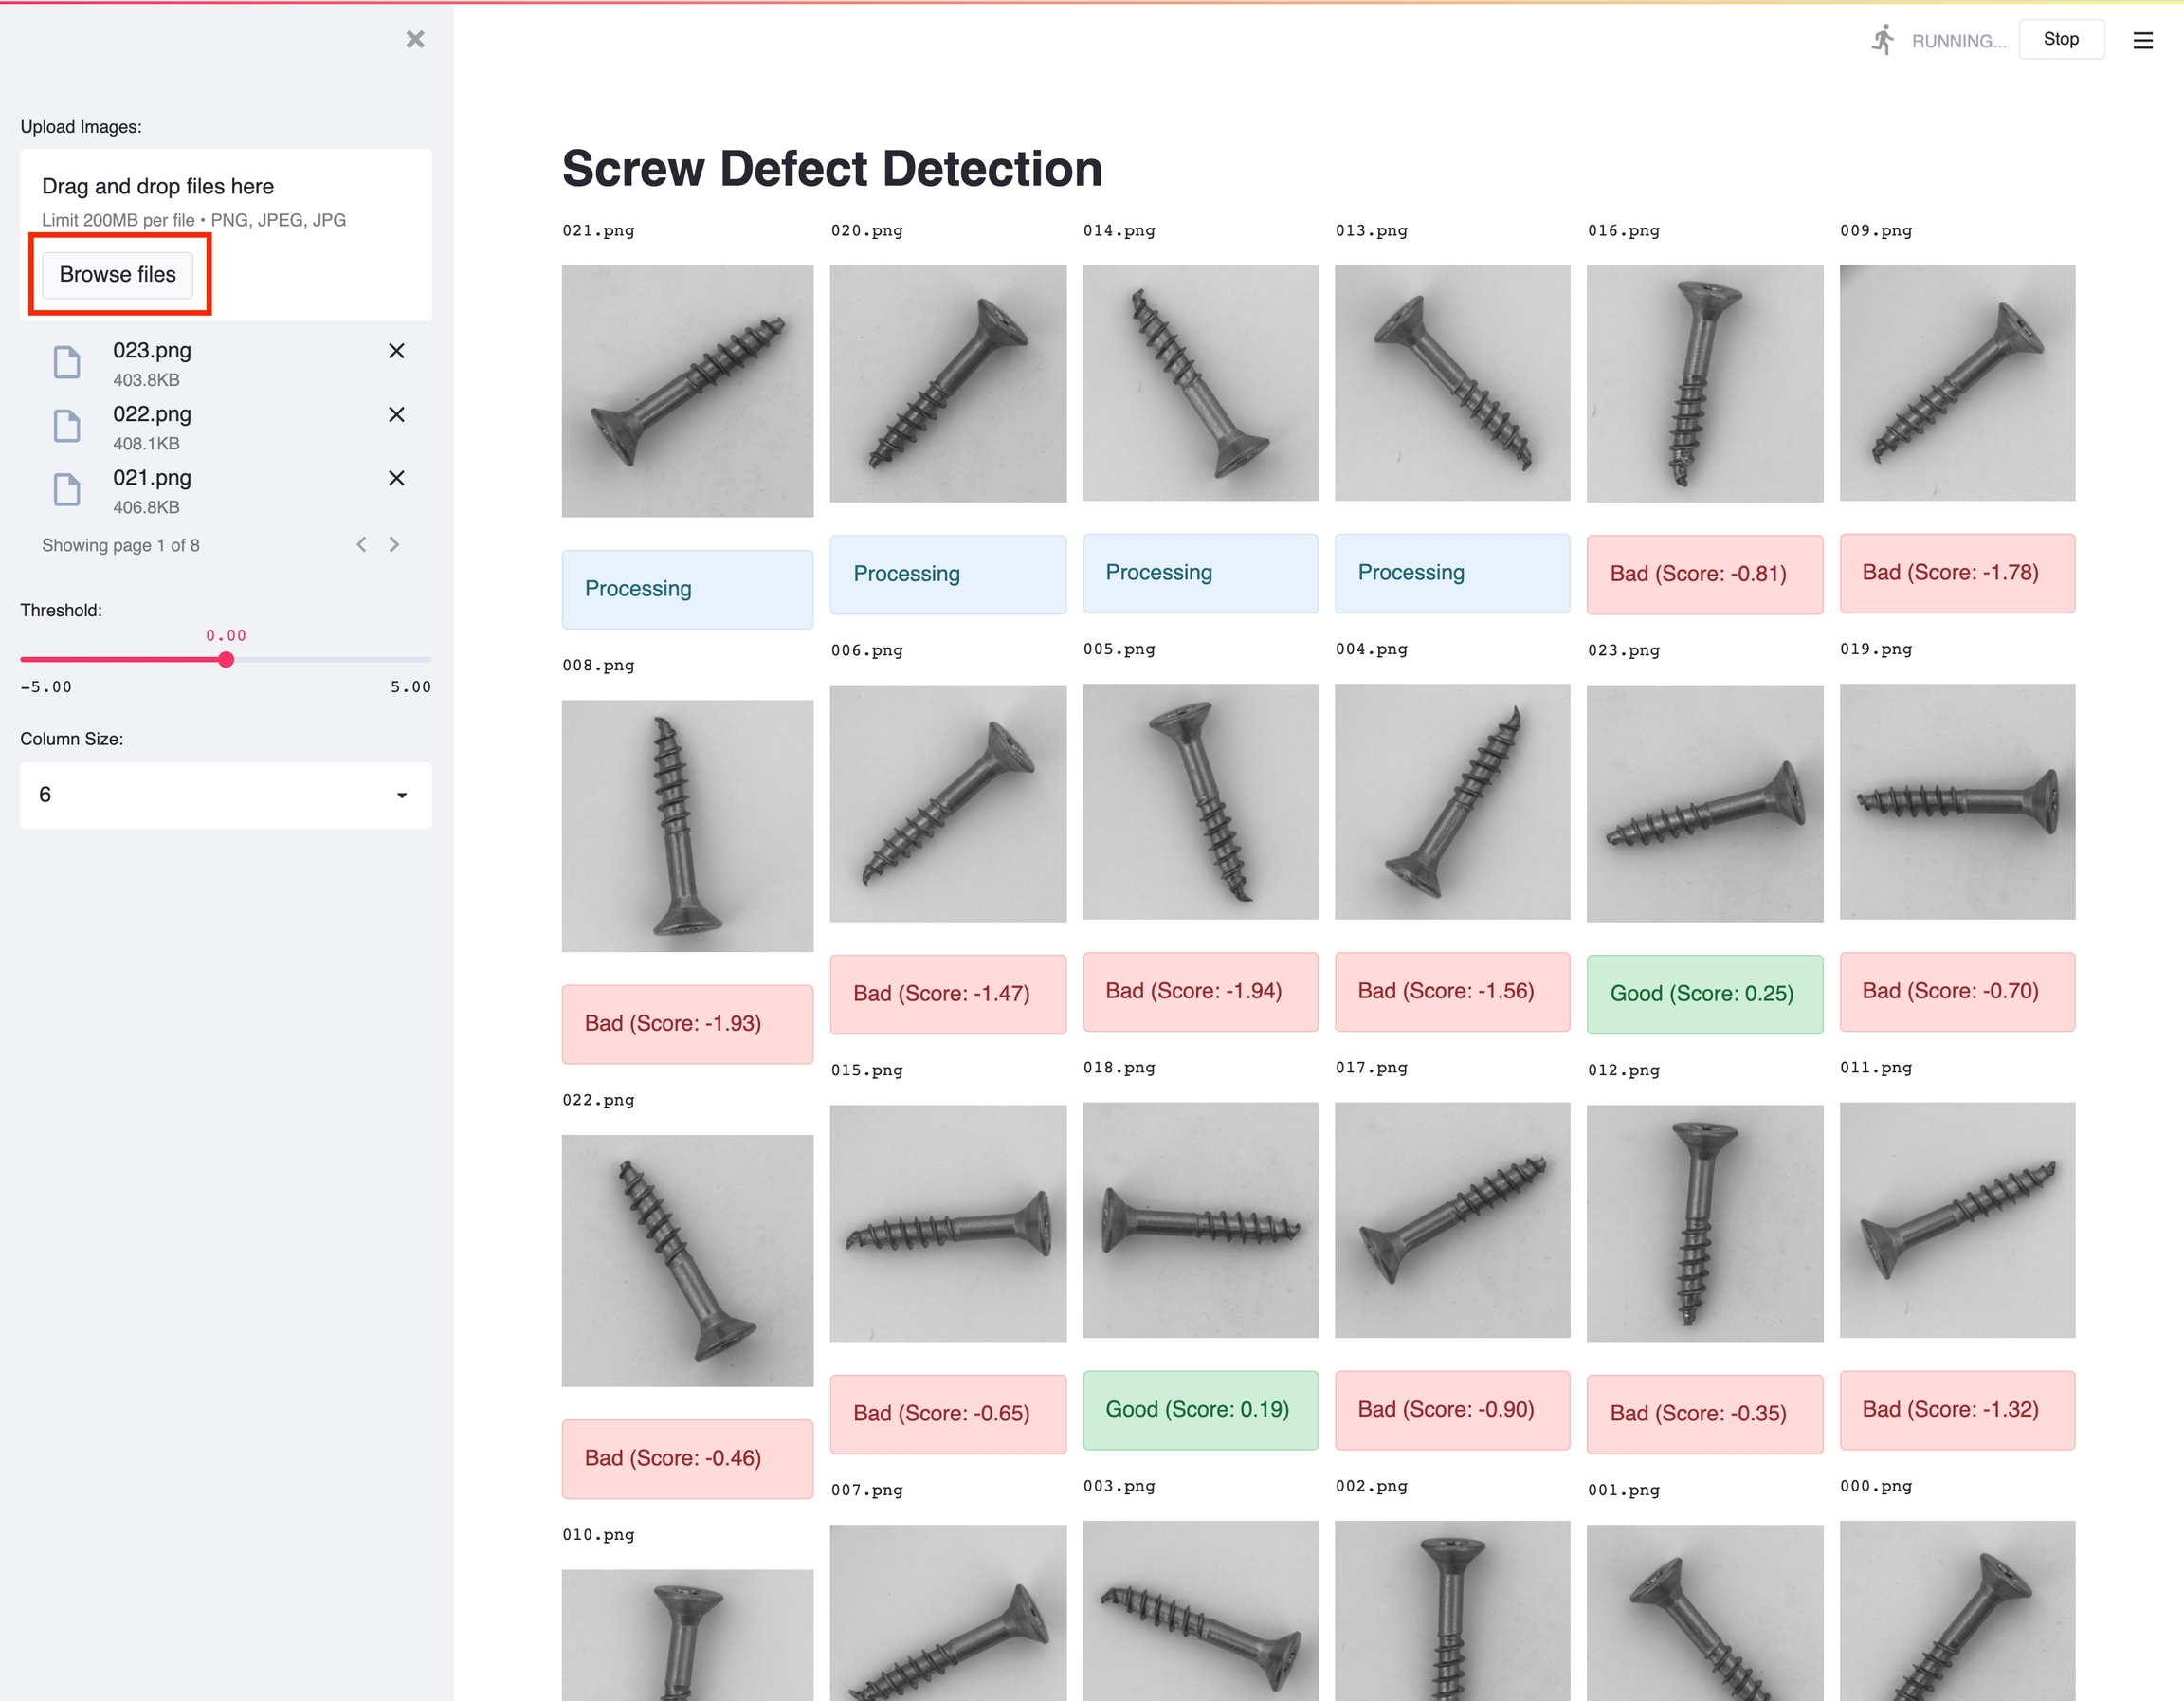
Adjust the layout of the screw images by selecting a Column Size in the left sidebar. The threshold to determine good and bad screws can also be adjusted with the Threshold slider.
Conclusion
Congratulations! We've finished the tutorial and deployed our model with a web interface.
Next Section
The next section will summarize what we've done in these end-to-end tutorials.