5 - Summary
We've achieved a lot during this tutorial, let's review what we have achieved and how PrimeHub helped us at each stage of the process.
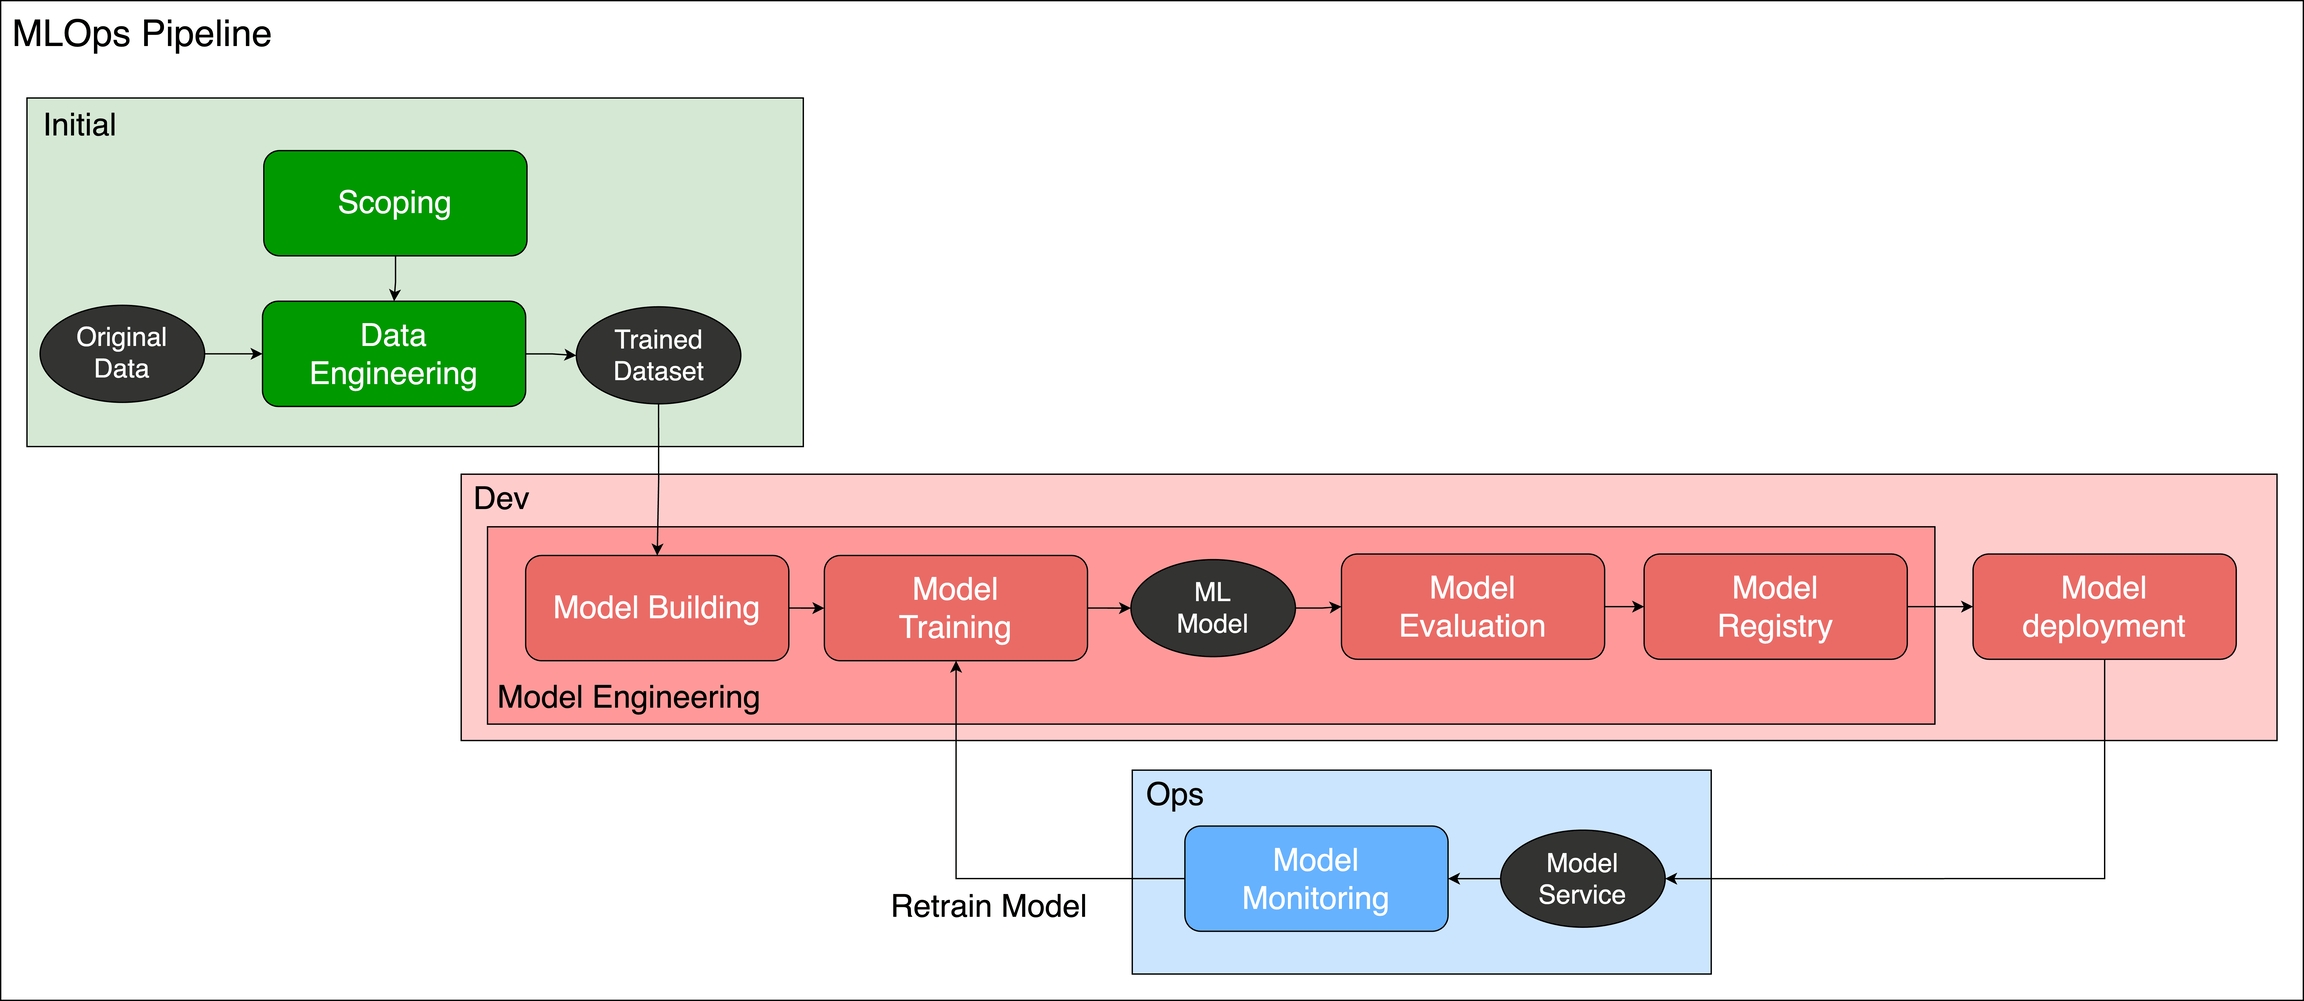
Part 1 - MLOps Introduction and Scoping the Project
In this part, we introduced the MLOps concept and learned how to build a good data and machine learning pipeline. Otherwise, we provide a table that can give the project owner the three important elements of machine learning - Data, Model, and Code.
Part 2 - Train and Tune the Model
In this part, we trained the model in Jupyter Notebook. The results were automatically logged into MLflow for experiment tracking. Also, if you want to run these PrimeHub functions in CI/CD pipeline automatically, you can see the detailed information about the PrimeHub SDK/CLI tool in the advanced tutorial section.
Once connected to PrimeHub, MLflow auto logging means that job results can be collected and reviewed easily. Data on parameters, metrics, and artifacts are available for model training history.
If you want to label the image dataset we can used Label Studio, installed via PrimeHub Apps, to label a series of screw images in this part. You can see the detailed information about labeling data in the advanced tutorial section.
Part 3 - Manage, Compare, and Deploy the Model
In this part, we compared the results of our jobs and registered the better-performing model to PrimeHub Models. After customizing a server image, we deployed the model as a web service endpoint.
PrimeHub's Model Management stores version-managed models for use in different projects, frameworks, or any designated use. Users can access previously trained models, deploy models, and share well-trained models across teams.
Once ready for deployment, the input and output of a model image can be customized and then deployed in a cloud-ready environment using PrimeHub's Model Deployment feature. There's no need for users to provision server resources, PrimeHub takes care of setting up all required resources.
Part 4 - Build the Web App
In this part, we added a web interface to our endpoint using Streamlit, also installed via PrimeHub Apps.
Streamlit is a powerful tool for building web apps with trained models. Web apps made with Streamlit have many uses, such as data feedback, correction, model validation, etc.
With PrimeHub, you will experience a wonderful machine-learning journey! Enjoy it!