PrimeHub
v4.1
v4.1
  • Introduction
  • Installation
  • Tiers and Licenses
  • End-to-End Tutorial
    • 1 - MLOps Introduction and Scoping the Project
    • 2 - Train and Manage the Model
    • 3 - Compare, Register and Deploy the Model
    • 4 - Build the Web Application
    • 5 - Summary
  • User Guide
    • User Portal
    • Notebook
      • Notebook Tips
      • Advanced Settings
      • PrimeHub Notebook Extension
      • Submit Notebook as Job
    • Jobs
      • Job Artifacts
      • Tutorial
        • (Part1) MNIST classifier training
        • (Part2) MNIST classifier training
        • (Advanced) Use Job Submission to Tune Hyperparameters
        • (Advanced) Model Serving by Seldon
        • Job Artifacts Simple Usecase
    • Models
      • Manage and Deploy Model
      • Model Management Configuration
    • Deployments
      • Pre-packaged servers
        • TensorFlow server
        • PyTorch server
        • SKLearn server
        • Customize Pre-packaged Server
        • Run Pre-packaged Server Locally
      • Package from Language Wrapper
        • Model Image for Python
        • Model Image for R
        • Reusable Base Image
      • Prediction APIs
      • Model URI
      • Tutorial
        • Model by Pre-packaged Server
        • Model by Pre-packaged Server (PHFS)
        • Model by Image built from Language Wrapper
    • Shared Files
    • Datasets
    • Apps
      • Label Studio
      • MATLAB
      • MLflow
      • Streamlit
      • Tutorial
        • Create Your Own App
        • Create an MLflow server
        • Label Dataset by Label Studio
        • Code Server
    • Group Admin
      • Images
      • Settings
    • Generate an PrimeHub API Token
    • Python SDK
    • SSH Server Feature
      • VSCode SSH Notebook Remotely
      • Generate SSH Key Pair
      • Permission Denied
      • Connection Refused
    • Advanced Tutorial
      • Labeling the data
      • Notebook as a Job
      • Custom build the Seldon server
      • PrimeHub SDK/CLI Tools
  • Administrator Guide
    • Admin Portal
      • Create User
      • Create Group
      • Assign Group Admin
      • Create/Plan Instance Type
      • Add InfuseAI Image
      • Add Image
      • Build Image
      • Gitsync Secret for GitHub
      • Pull Secret for GitLab
    • System Settings
    • User Management
    • Group Management
    • Instance Type Management
      • NodeSelector
      • Toleration
    • Image Management
      • Custom Image Guideline
    • Volume Management
      • Upload Server
    • Secret Management
    • App Settings
    • Notebooks Admin
    • Usage Reports
  • Reference
    • Jupyter Images
      • repo2docker image
      • RStudio image
    • InfuseAI Images List
    • Roadmap
  • Developer Guide
    • GitHub
    • Design
      • PrimeHub File System (PHFS)
      • PrimeHub Store
      • Log Persistence
      • PrimeHub Apps
      • Admission
      • Notebook with kernel process
      • JupyterHub
      • Image Builder
      • Volume Upload
      • Job Scheduler
      • Job Submission
      • Job Monitoring
      • Install Helper
      • User Portal
      • Meta Chart
      • PrimeHub Usage
      • Job Artifact
      • PrimeHub Apps
    • Concept
      • Architecture
      • Data Model
      • CRDs
      • GraphQL
      • Persistence Storages
      • Persistence
      • Resources Quota
      • Privilege
    • Configuration
      • How to configure PrimeHub
      • Multiple Jupyter Notebook Kernels
      • Configure SSH Server
      • Configure Job Submission
      • Configure Custom Image Build
      • Configure Model Deployment
      • Setup Self-Signed Certificate for PrimeHub
      • Chart Configuration
      • Configure PrimeHub Store
    • Environment Variables
Powered by GitBook
On this page
  • Creating New Instance Types
  • Toleration
  • Node Selector
  • Edit Groups
  1. Administrator Guide

Instance Type Management

PreviousGroup ManagementNextNodeSelector

Last updated 10 days ago

Instance type management provides the capabilities of managing a cluster of the computation resources by instances management such as create, delete, edit instances and of permission-control which allows only specified-groups to use the instances.

Creating New Instance Types

Click Add to add an Instance Type, which will pop up the editing screen of Instance Types.

You need to fill in the fields of Basic Info in the above picture:

  • Name Only lowercase letters, numbers, hyphen - and a dot . can be filled in.

  • Display name The display name of this Instance Type, and will be seen by users.

  • Description The description of this Instance Type, and will be seen by users.

  • CPU Limit define how many CPU are allowed to use by this Instance Type. The value is also applied to CPU Request when CPU Request is disabled.

  • Memory Limit define how many memory are allowed to use by this Instance Type. The value also applied to Memory Request when Memory Request is disabled.

  • GPU Limit define how many GPU can be used by this Instance Type. GPU can only be integer.

  • GPU Resource Name define which type of GPU is going to be used, you can specify amd.com/gpu or nvidia.com/gpu. The GPU Limit must be larger than 1 to enable this field.

Overcommitting (advanced feature)

  • CPU Request define how many CPU are requested to use by this Instance Type initially. Once it is enabled, instances are guaranteed to get the amount of CPU they request. If CPU Request < CPU Limit, the system will try to overcommit CPU resources within the limit if more resources are available.

  • Memory Request define how many Memory are requested to use by this Instance Type initially. Once it is enabled, instances are guaranteed to get the amount of Memory they request. If Memory Request < Memory Limit, the system will try to overcommit Memory resources within the limit if more resources are available.

  • Global If it is turned on, this Instance Type can be chosen by everyone. You can grant permission to specific groups in the Edit Groups.

Finally, click Confirm to complete the addition.

Toleration

When a node has a taint for certain reasons, an instance won't be scheduled to run on that node until an instance has a specific toleration to tolerate specified taint. Here we will show you how to add a toleration only.

In Toleration tab, you can add a Toleration by clicking on Add button.

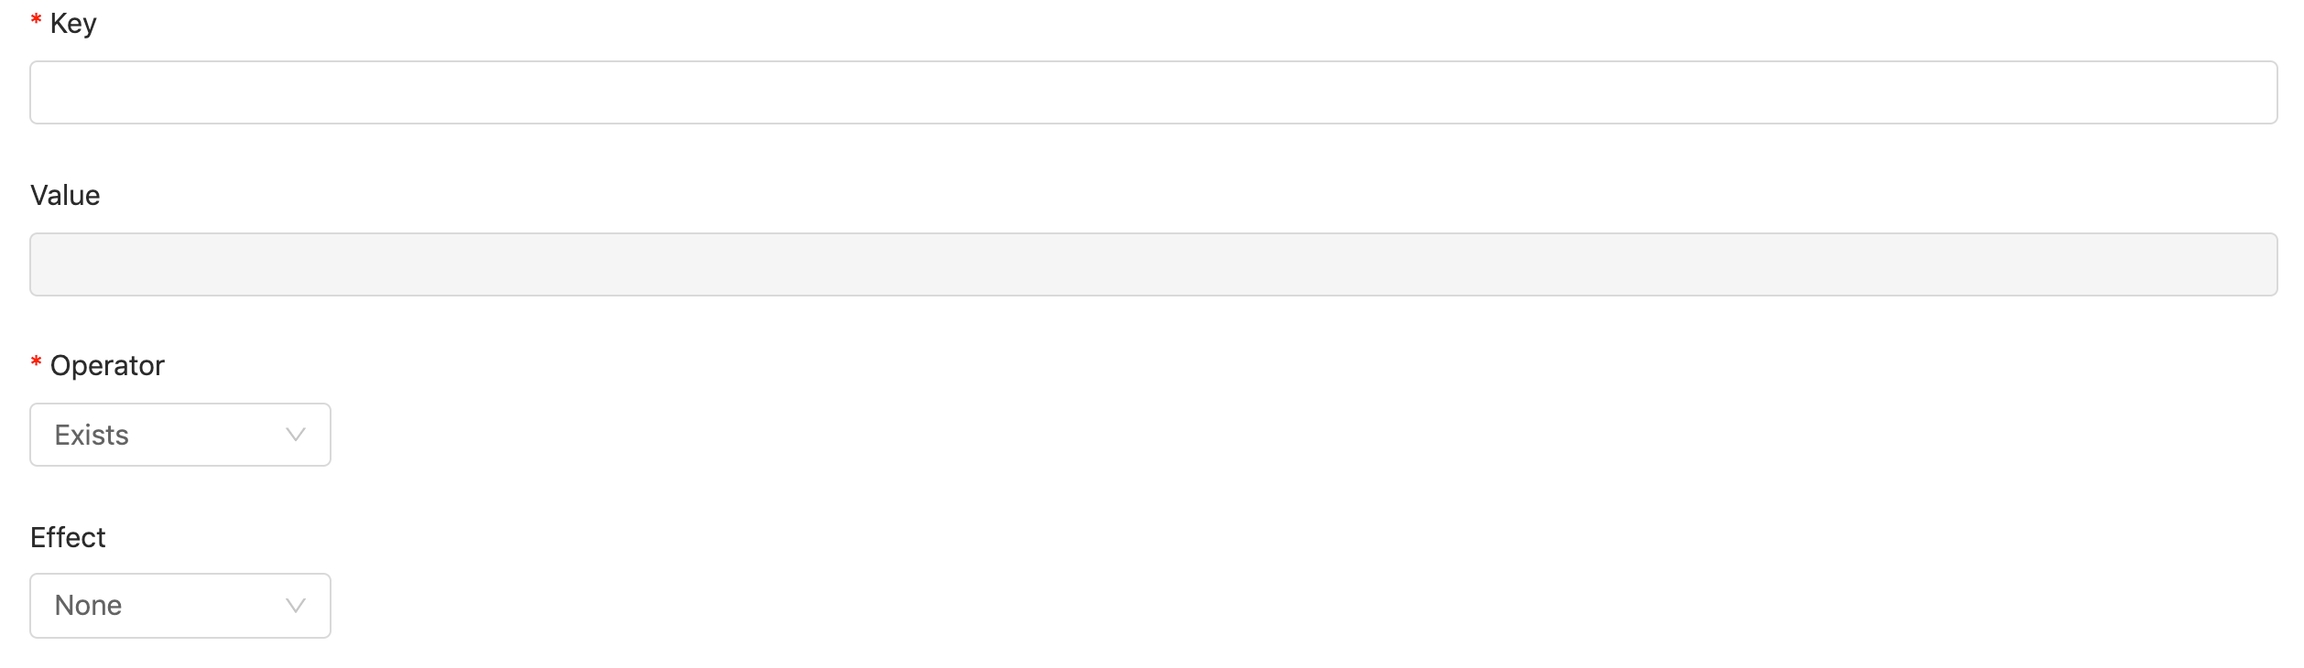
Filling in the fields in popup to create a toleration.

  • Key The key of taint which you want to tolerate.

  • Value The value of taint is required if Equal from Operator is selected.

  • Operator (Mandatary) Select Equal, Exists.

  • Effect Select None, NoSchedule, PreferNoSchedule, NoExecute

Click OK to add a toleration.

Finally, click Confirm to complete the addition.

For a use case of toleration, please see Toleration Use Case.

Node Selector

You can constrain an instance to only be able to run on specific nodes which have specific labels. A label is a map of key-value pair. Here we will show you how to add a nodeSelector only.

For more detail, please refer to Assigning Pods to Nodes for usage kubectl label.

In Node Selector tab, you can add a NodeSelector by clicking on + Add field button.

Filling in key/value with key-value of a label you want to specify.

Click Confirm to complete the addition.

Edit Groups

If Global is disabled, please click Edit Groups under the edit Instance Type screen to select the groups that have permission to use the Instance Type.

For details, please see and .

For more detail and usage of kubectl taint, please refer to Taints and .

Regarding options of Operator and Effect, please refer to .

For a use case, please see .

Quality of Service for Pods
Resource QoS
Tolerations concept
Taints and Tolerations
Node Selector Use Case